




















Under the staff settings, you can easily manage all the information related to your team-for example, create a profile for each staff member and add more detailed descriptions if needed. That way, clients get a sense of who they’ll be meeting, what that person’s style is like, and what services they offer, right from the online booking stage.
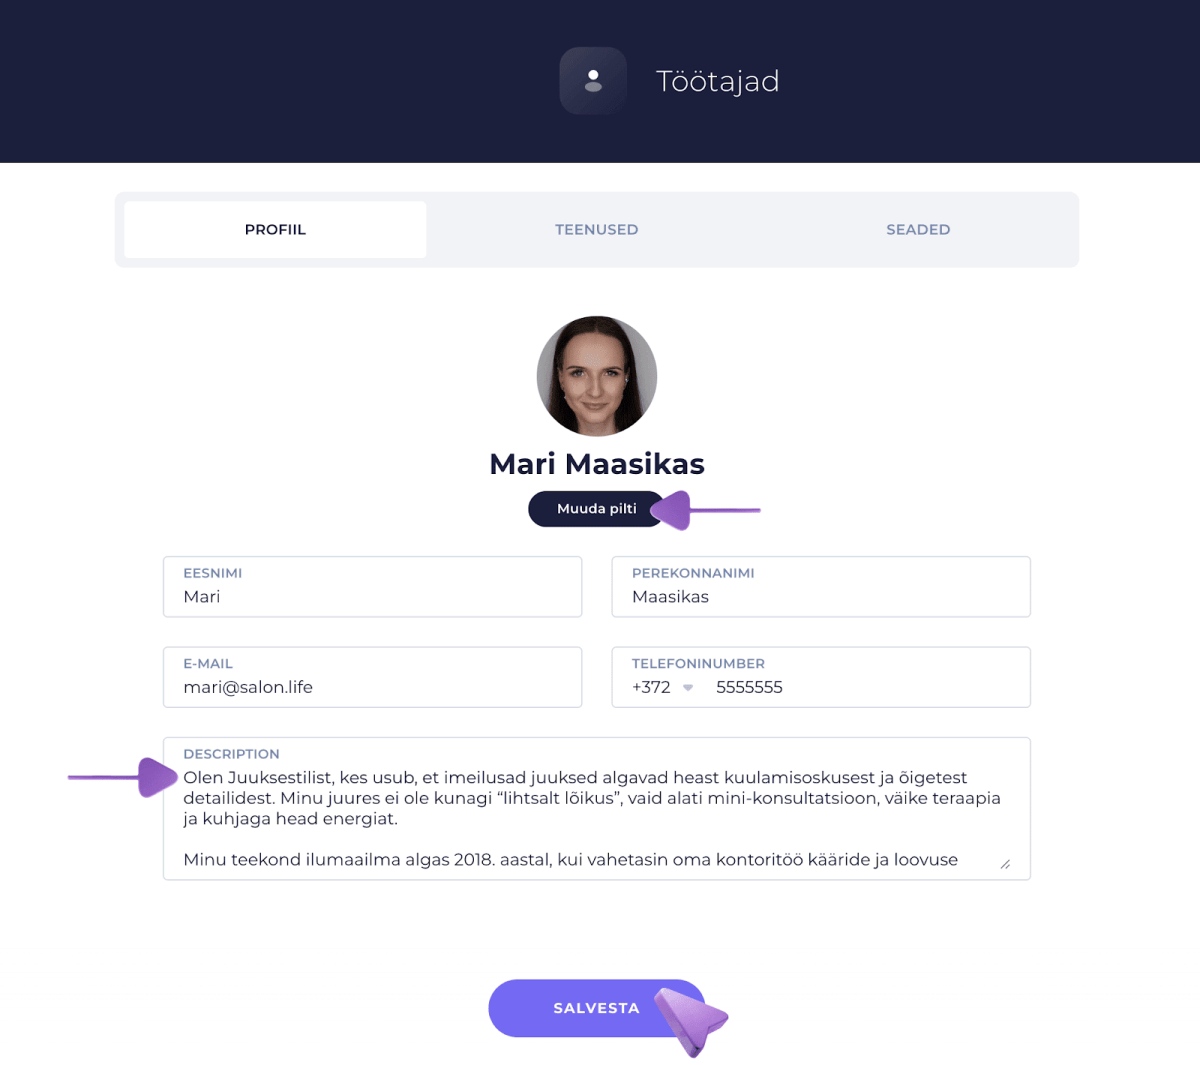
Adding a Staff Profile Photo
To add a staff profile photo:
- Open the Apps page.
- Find the Staff tab.
- Open the profile of the staff member you want to add a photo for.
- Click the Change Photo button and upload the staff member’s photo.
- Save your changes, and you’re done!
Why Does a Staff Bio Matter?
Showing a staff bio in online booking helps:
- give clients more information about your experience, skills, and achievements,
- highlight your distinctive style or working methods,
- share a nice greeting or a positive message,
- build trust with new clients who haven’t met you before.
TIP:
If you’d like, you can add a short, fun quote or a long description. If the text is very long, clients see a "read more" button, so all the information is still available without taking up too much space at first.
How to Add a Staff Bio
- In SalonLife, go to the Apps page and select Staff.
- Select the profile of the staff member whose information you want to change.
- On the page that opens, find Staff Bio.
- Enter the text you want, whether that’s a short greeting, a longer backstory, or a general overview of your experience.
- Once you’re happy with the bio, click Save.
TIP:
If you look at the online booking page now, you’ll see the description you entered next to that staff member’s name and photo. If the description is longer than usual, a "read more" button appears to access it.
What to Keep in Mind With a Staff Bio
- Use the opportunity to highlight your key skills or achievements.
- Add a bit of personality, so clients feel welcomed and looked forward to, even before booking.
- Always check for spelling mistakes or awkward phrasing, since a well-written sentence creates a professional impression.
- After saving, check the online booking page yourself to see how the bio is displayed.
Adding Services for a Staff Member
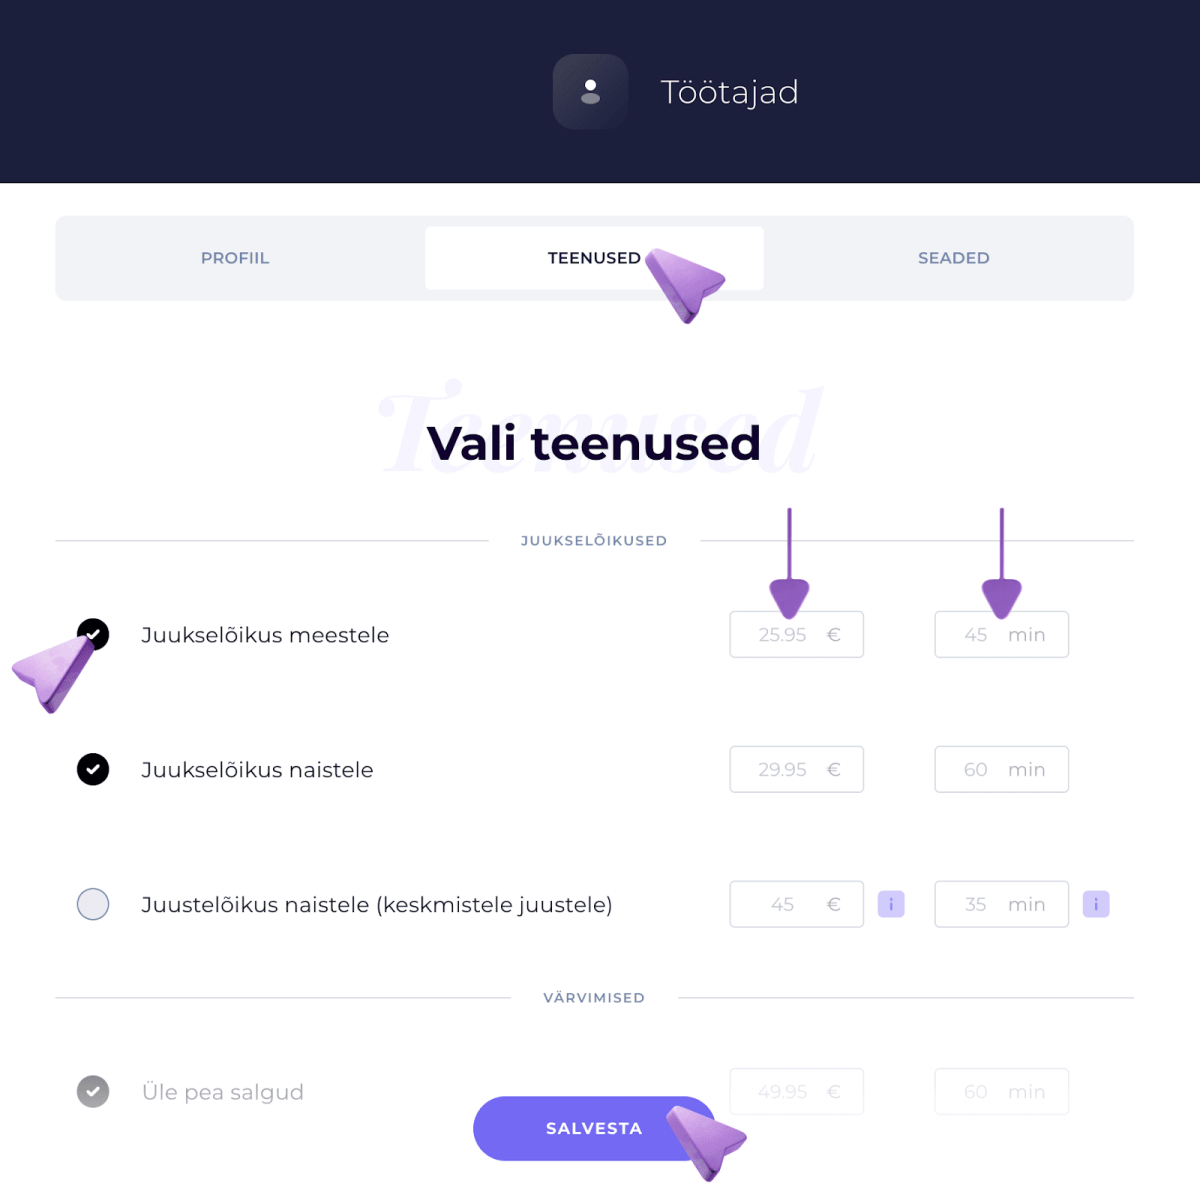
If you want to assign services to a staff member, or remove them, here’s how:
- After opening the staff member’s profile, select Services from the white bar.
- All previously added services then appear. Turn on the services that this particular staff member offers.
- You can also change the service’s price and duration if it differs from the base rate for this staff member.
- Save your changes.
Staff Settings Overview
Every staff member has their own preferences, both for online booking settings and for sending notifications. In SalonLife, you can set up individual settings for each staff member:
- After opening the staff member’s profile, select Settings from the white bar.
- A wide range of settings then opens up.
Base Work Schedule
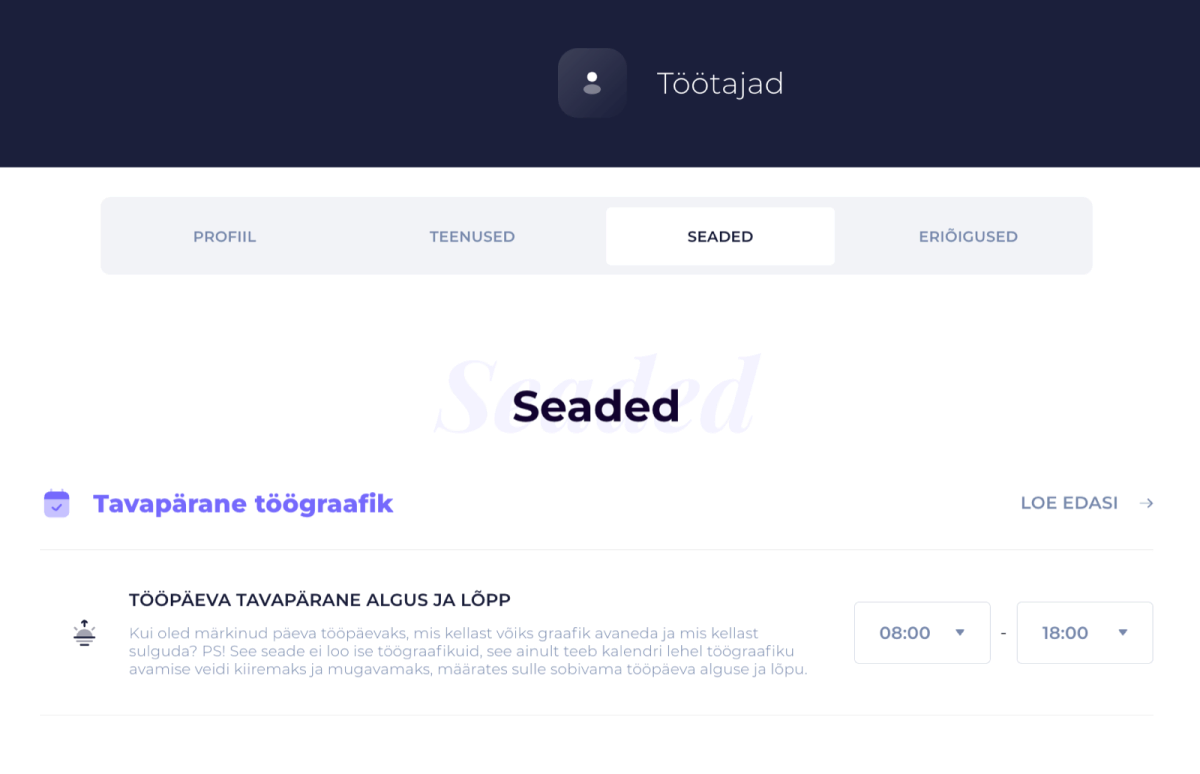
- Workday Start and End - sets the time window during which the staff member accepts online bookings at all (e.g., 09:00-18:00).
NB! This doesn’t create a schedule-it only sets the boundaries within which times are shown.
You’ll find more about this setting in another article.
Notifications
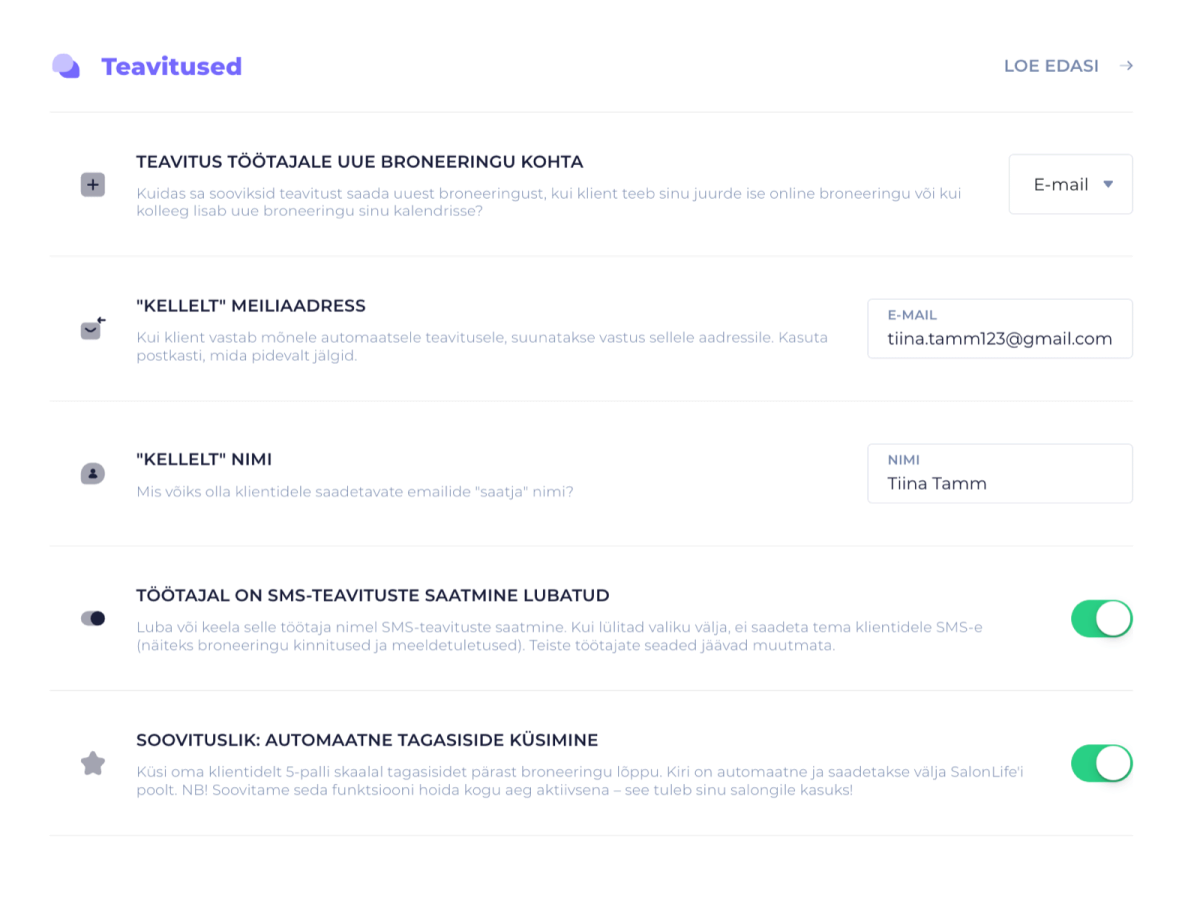
- Notify Staff Member of New Bookings - SalonLife sends the staff member an email or SMS for every new online booking or appointment added by a colleague.
NB! Keep in mind that SMS messages use up SMS credits. - "From" Email Address - the email address where client replies to automatic emails arrive.
- "From" Name - the name clients see as the sender in notifications.
- Staff Member Can Send SMS Notifications - turns SMS notifications sent by the staff member (confirmations, reminders) on or off.
- Automatic Feedback Requests - sends the client an automatic question after their visit, to collect feedback on a 5-point scale. This is highly recommended, since feedback is visible not only on the Bookings page but also on the SalonLife.com profile page, which builds trust with clients and makes them more comfortable booking with you for the first time.
Read more in the article about feedback.
Online Booking
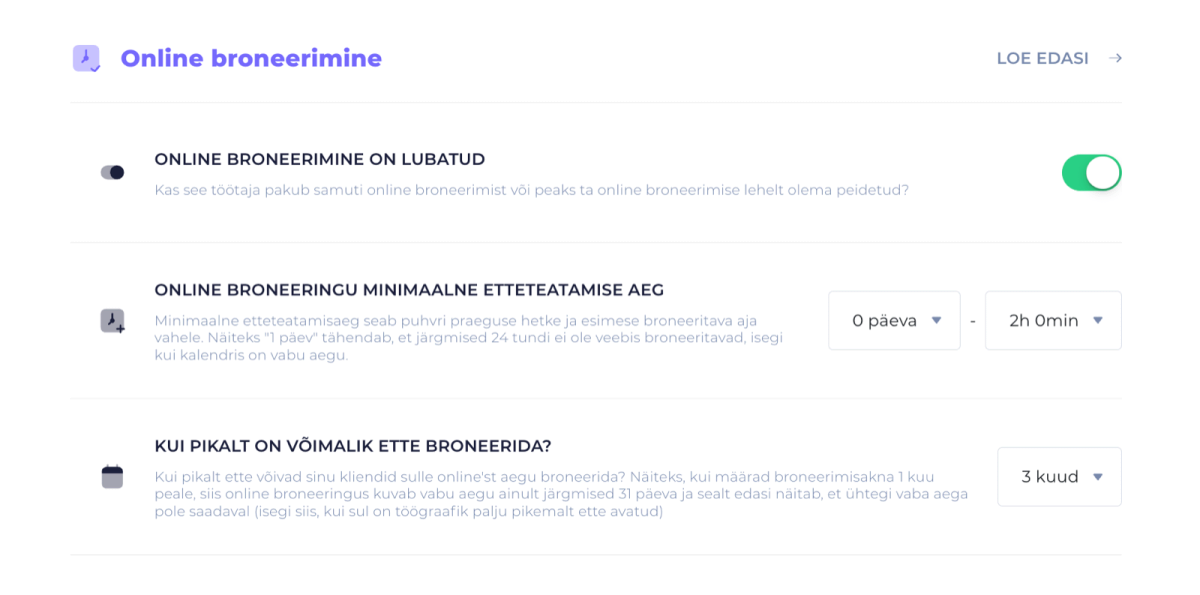
- Online Booking Enabled - sets whether this staff member offers online booking, or whether the staff member would rather clients couldn’t book an appointment with them through the online booking link.
- Minimum Advance Notice for Online Booking - the minimum notice period, meaning how close to the current time you allow a client to book an appointment for themselves online.
Example: If the notice period is set to 2h, the online booking system always shows the client the first available time slot 2 hours later, to avoid a situation where a client makes a booking and you don’t have time to prepare the salon for the client yet. - How Far Ahead Can Clients Book? - Online booking only shows open times within that bookable time window.
If the booking window is, say, 1 month, clients can only book appointments within the next 31 days. Even if your work schedule is open further ahead than that, times beyond it aren’t shown in online booking.
If you want clients to be able to book further ahead, you need to extend the booking window in the settings.
Example: If your calendar has workdays open for, say, 5 months, and this setting is set to, say, 3 months, clients will see open times within that 3-month range.
Displaying Open Time Slots
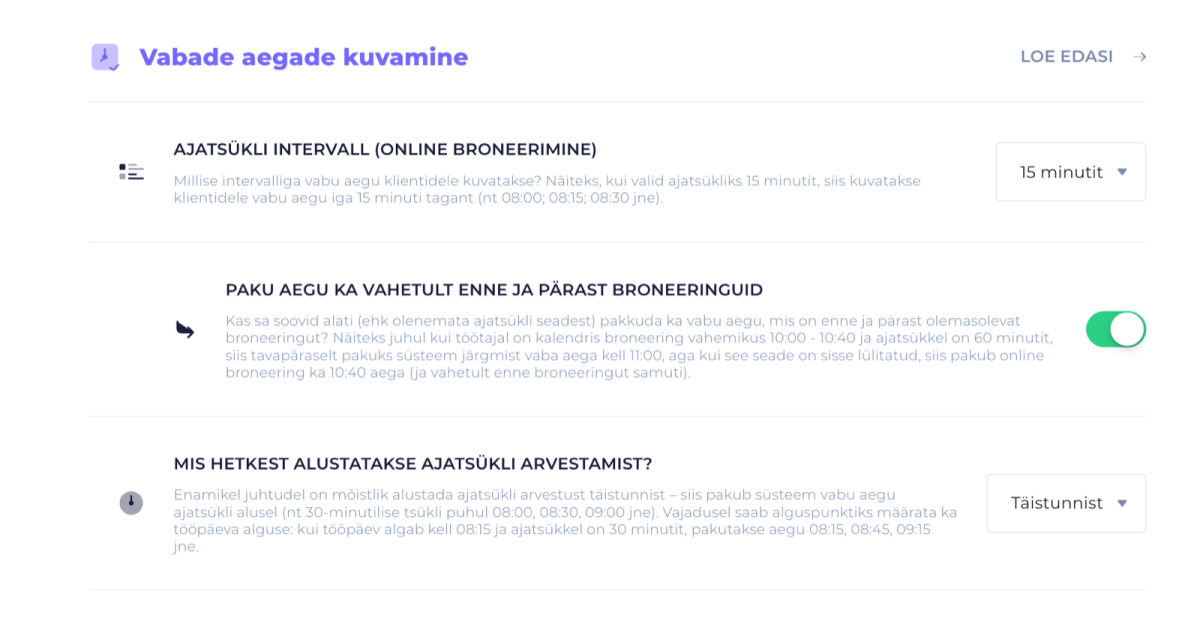
- Time Slot Interval - the rhythm in which open times are shown to clients (for example, every 15 minutes: 8:00, 8:15, 8:30, 8:45, and so on).
- Also Offer Times Right Before and After Bookings - This setting lets online booking also offer open times right before and after existing bookings, regardless of the time slot length.
Example: if the time slot is 60 minutes and a booking runs from 10:00-10:40, the next open time would normally show as 11:00. If this setting is turned on, the system also offers 10:40 for booking (and, if needed, right before an existing booking too).
- When Does the Time Slot Cycle Start Counting From? - this setting determines the point from which times are offered to clients in online booking. Whether the cycle always starts from the top of the hour or from the start of the workday (this affects how times display, e.g., 08:00, 08:15, and so on).
Additional Options
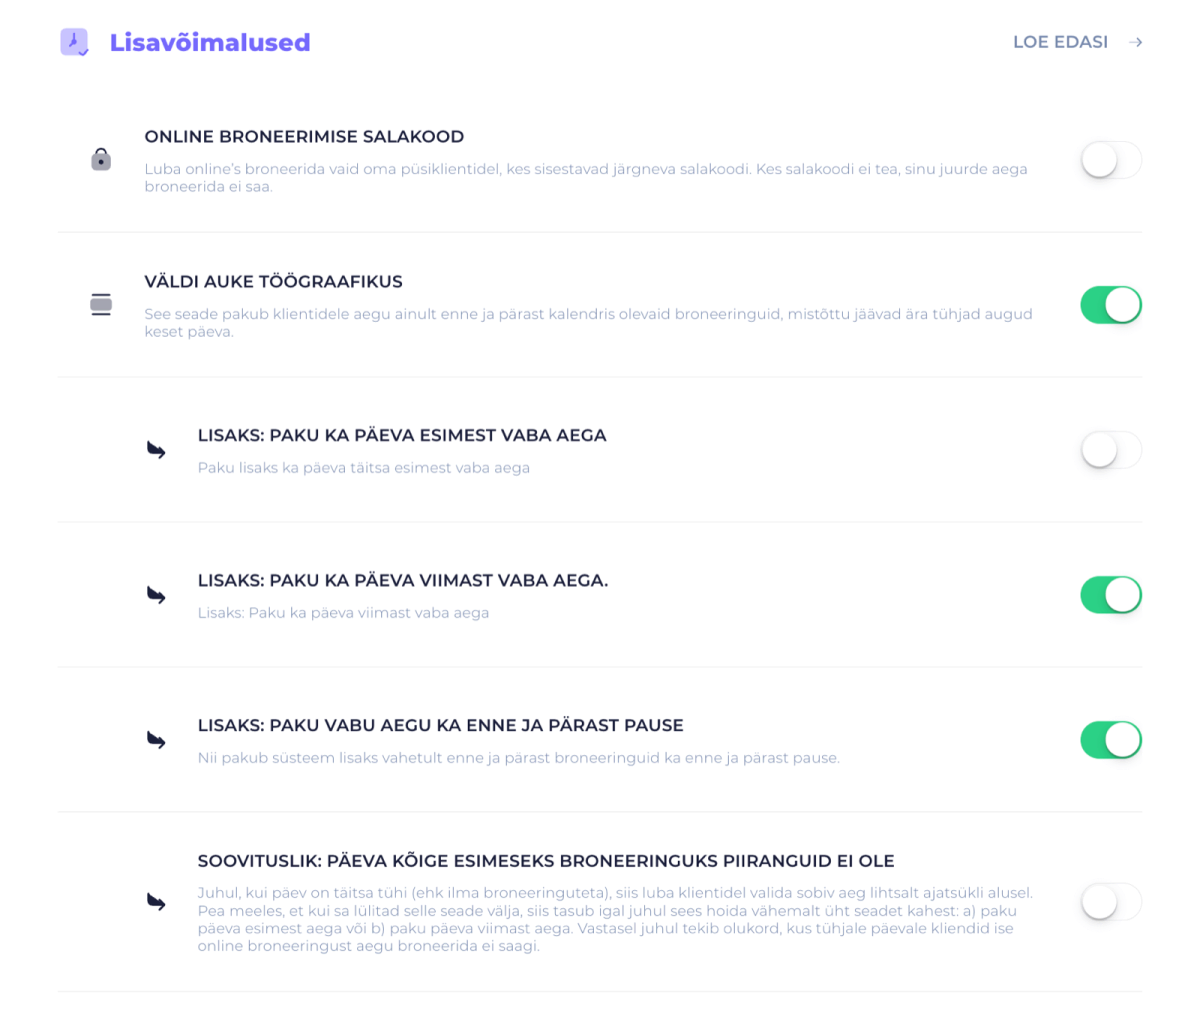
- Online Booking Passcode - adds a code entry step at the start of online booking. Only people who have the passcode (VIPs, returning clients) can book.
- Avoid Gaps in the Work Schedule - clients are only offered times that fall right before or after existing bookings (avoids empty gaps in the middle of the day).
- Turning on Avoid Gaps in the Work Schedule also opens up the following settings:
- Also Offer the Day’s First Open Slot - also shows the first open slot, even if it doesn’t fit the time slot cycle.
- Also Offer the Day’s Last Open Slot - shows the last possible time of the day.
- Also Offer Open Slots Before and After Breaks - shows the client times that fall before and after a break in the calendar.
- Recommended: No Restrictions on the First Booking - if no bookings have come in yet for a workday in online booking, the first client can choose from all open times based on the time slot cycle (avoids a situation where an empty day can’t be booked at all).
Under the staff settings, you can conveniently manage everything related to your team, from a staff member’s profile, photo, and bio to their services, prices, and working hours.
A well-filled-out staff profile helps clients make a more informed choice in online booking, builds trust, and lets you flexibly set booking, notification, and scheduling settings for each staff member to match how they work.