




















With this hands-on guide, you can have your SalonLife account fully set up and ready to go in just 10 minutes. Most of the settings are already in place for you, but before you share your online booking link with clients, we recommend reviewing three key steps: adding your services, building your work schedule, and setting up staff preferences. Below, we’ll walk you through each one, step by step.
1) Add Your Services
.png)
First, open the Apps menu and go to the Services page. You’ll already find a few sample services and categories there, which you can edit or delete as you like.
- Delete the sample services:
- Click the three-dot button next to the service, on the right.
- Click Delete Service. - Create your own categories:
- Go to the Categories page and delete the sample categories if you like.
- Click the green (+) button, enter the category name, and save. - Add your services:
- Back on the Services page, click the green (+) button.
- Set the service’s name, price, duration, and category.
- If needed, add a detailed description, buffer time (prep and finish time), or any other useful info.
TIP:
If you already have a large service list as an Excel file, you can import it from the Data Import page.
2) Create Your Work Schedule and Add Bookings
Once your services are set up, let’s move on to the calendar. This helps you avoid double-booking and makes it easier to accept new online bookings.
2.1 Delete the Sample Bookings and Breaks
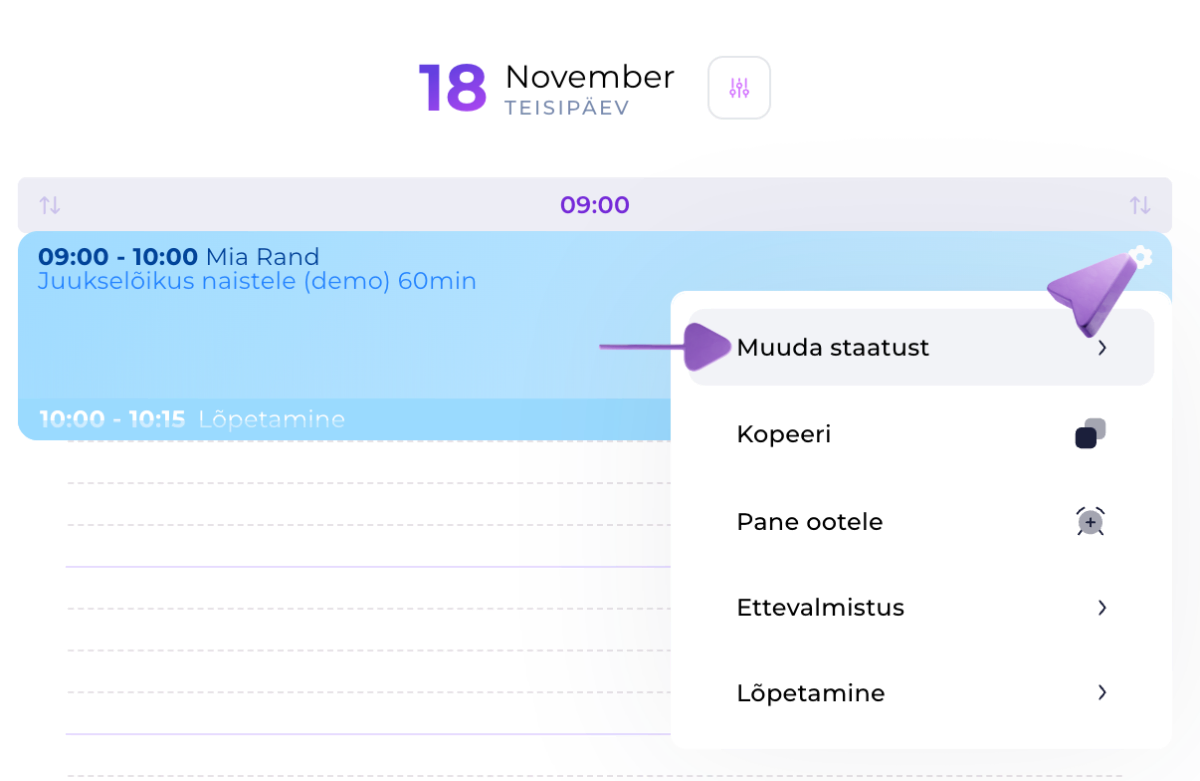
Your calendar may include a few sample bookings and breaks added to help you get your bearings at first. If you don’t need them:
- Click the sample booking and select Change Status, then choose Canceled.
- Click the break and, in the top corner, select Delete.
2.2 Create Your Work Schedule
.png)
Opening your work schedule is simple:
- Pick a day that works for you in the calendar.
- Click the date and select Mark as Workday.
- Set the day’s start and end time to match your needs.
If you’d like to copy the same workday to other dates as well:
- Click the date again, select Copy Schedule, then click Select Days and check off every date you want.
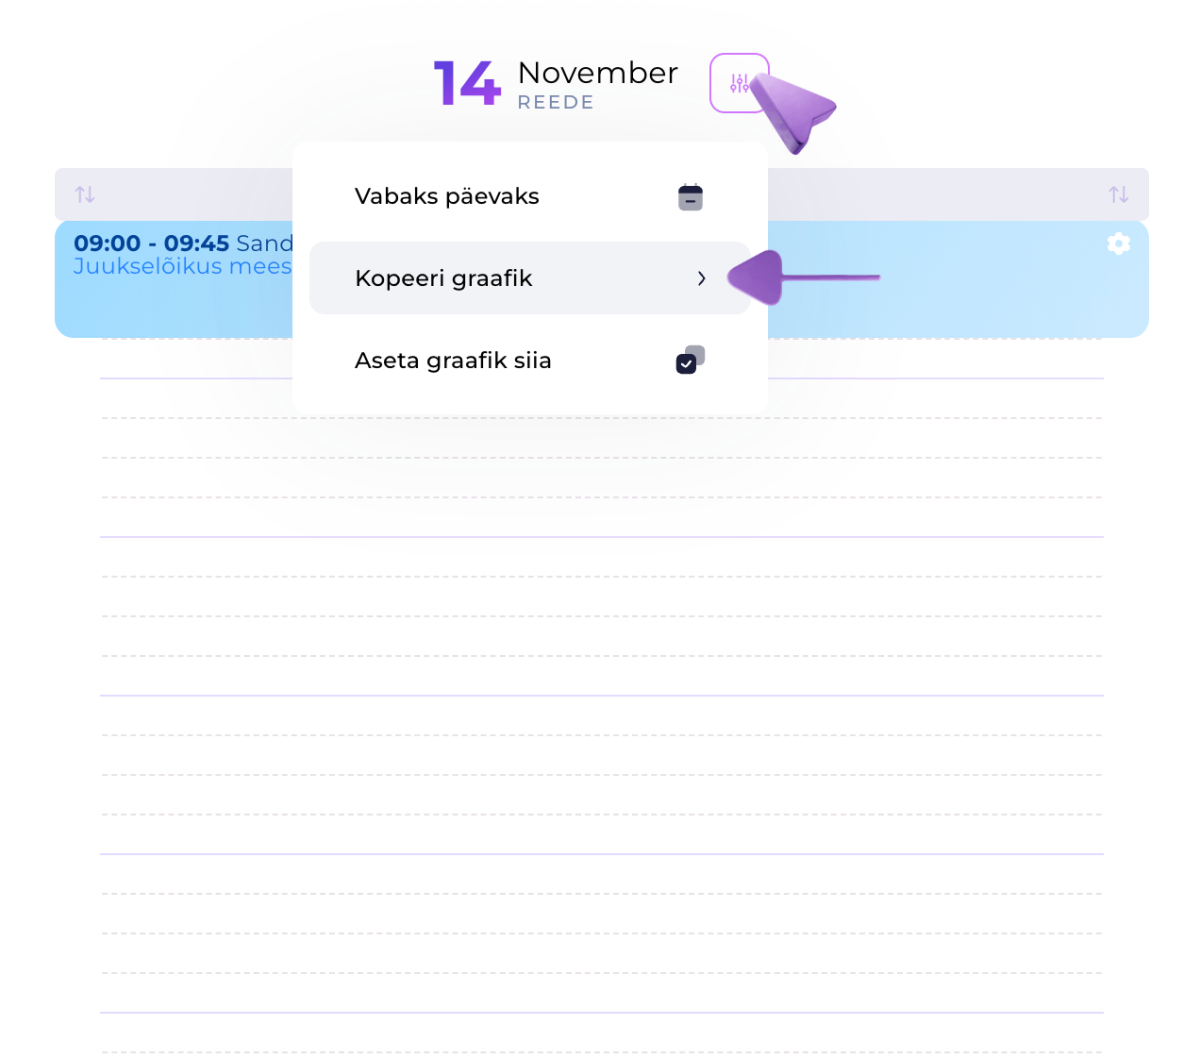
2.3 Add Existing Bookings
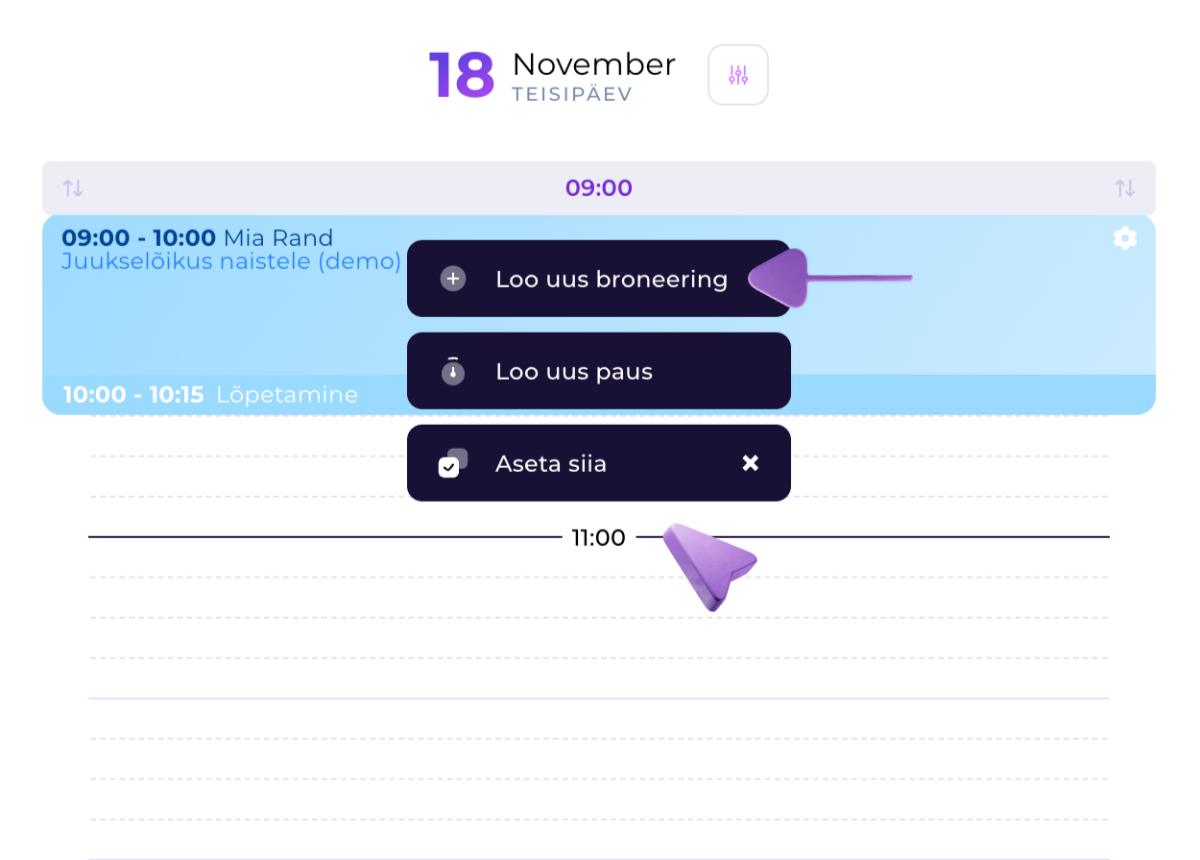
If you have earlier bookings, you can log them in the calendar:
- Go to the right date and time.
- Click the time slot and select Create New Booking.
- Set the service(s), choose the client via Add New Client, then click Save.
- If you like, move and adjust the booking afterward (drag it in the calendar or change its length).
2.4 Add Breaks
.png)
If you want to block off time in the calendar, for example a lunch break or a personal appointment:
- Click the time you want and select Create New Break.
- Set the break’s length and name.
- Save it — clients never see these breaks online.
3) Staff Settings and Profiles
.png)
The last main setting covers staff profiles and their online booking preferences.
- Open Apps and go to the Staff tab, then select a profile:
- Add a profile photo (click the gray icon, upload an image, and save).
- Adjust the online booking settings to match preferences (click the Settings button next to the staff member’s name).
- Set how many days or hours in advance clients can book (the booking window, notice period, and so on).
- Add more staff members if needed (click Add New Staff Member, fill in the details, and send your colleague an invite).
Your Online Booking Link
.png)
Once your services, schedule, and staff preferences are all in place, your setup is already far enough along that you can think about sharing your online booking link with clients.
- You’ll find your salon’s online booking link by going to Apps and the Online Booking tab.
- Copy it and add it to your Facebook, Instagram, or website, or share it with clients directly.
You can preview your online booking from the same page, and adjust the design, background images, colors, and any questions you ask clients.
Useful Extra Settings
- Automatic notifications: Use SMS and email notifications to send clients booking confirmations, reminders, thank-you messages, and other useful updates.
- Products: Add your products to the system and manage stock, so you can track sales conveniently from one place.
- Data import: Import large client lists or service and product catalogs straight from a file — it saves time and avoids manual entry.
When Your Trial Is About to End
During your trial, take your time and try out every feature. Before it ends, go to SalonLife Billing and choose the plan that suits you under the billing period, so online booking and your other features keep running without interruption.
Once you’ve made the following changes:
- added your services and categories,
- set up your calendar’s work schedule, bookings, and breaks,
- adjusted staff profiles and online booking settings,
…then you’re done — your whole setup is complete in 10 minutes and the system is ready to use.
Now you can share your online booking link with clients, start taking bookings, and get your salon running smoothly and professionally. Everything’s in one place — simple, fast, and under control.