




















If you want to keep your salon’s retail product stock organized and under control at all times, SalonLife is exactly what will help you with that every day!
In this guide, we’ll walk through step by step how to add new products, and also give you an overview of managing brands and categories, so it’s easy to keep your product range organized and run your daily work more efficiently.
TIP!
If you already have a separate product list (e.g. in Excel or another database), it’s worth checking out the data import option. This lets you upload product information into SalonLife automatically in just a couple of clicks.
1. Adding Brands
.png)
- From the Apps page, open the Products & Inventory page, then click Brands.
- Click the green (+) icon in the top right corner.
- Enter the brand’s name (e.g. “Schwarzkopf”).
- If needed, reorder brands by dragging them to the position you want in the list.
- Keep in mind that you can later rename or delete a brand from the Info button.
Once your brands are entered, you can use the Products button next to each brand to add or remove existing products under that brand.
2. Adding Categories
.png)
In a similar way, it’s helpful to set up categories in advance (for example, “Shampoos,” “Conditioners,” “Styling Products,” etc.).
- Open Products and select Categories.
- Click the green (+) button.
- Enter the category’s name.
- If you’d like, reorder or delete categories from the Info button.
- Once your categories are created, you can use the Products button to add the relevant products to them.
3. Adding a New Product
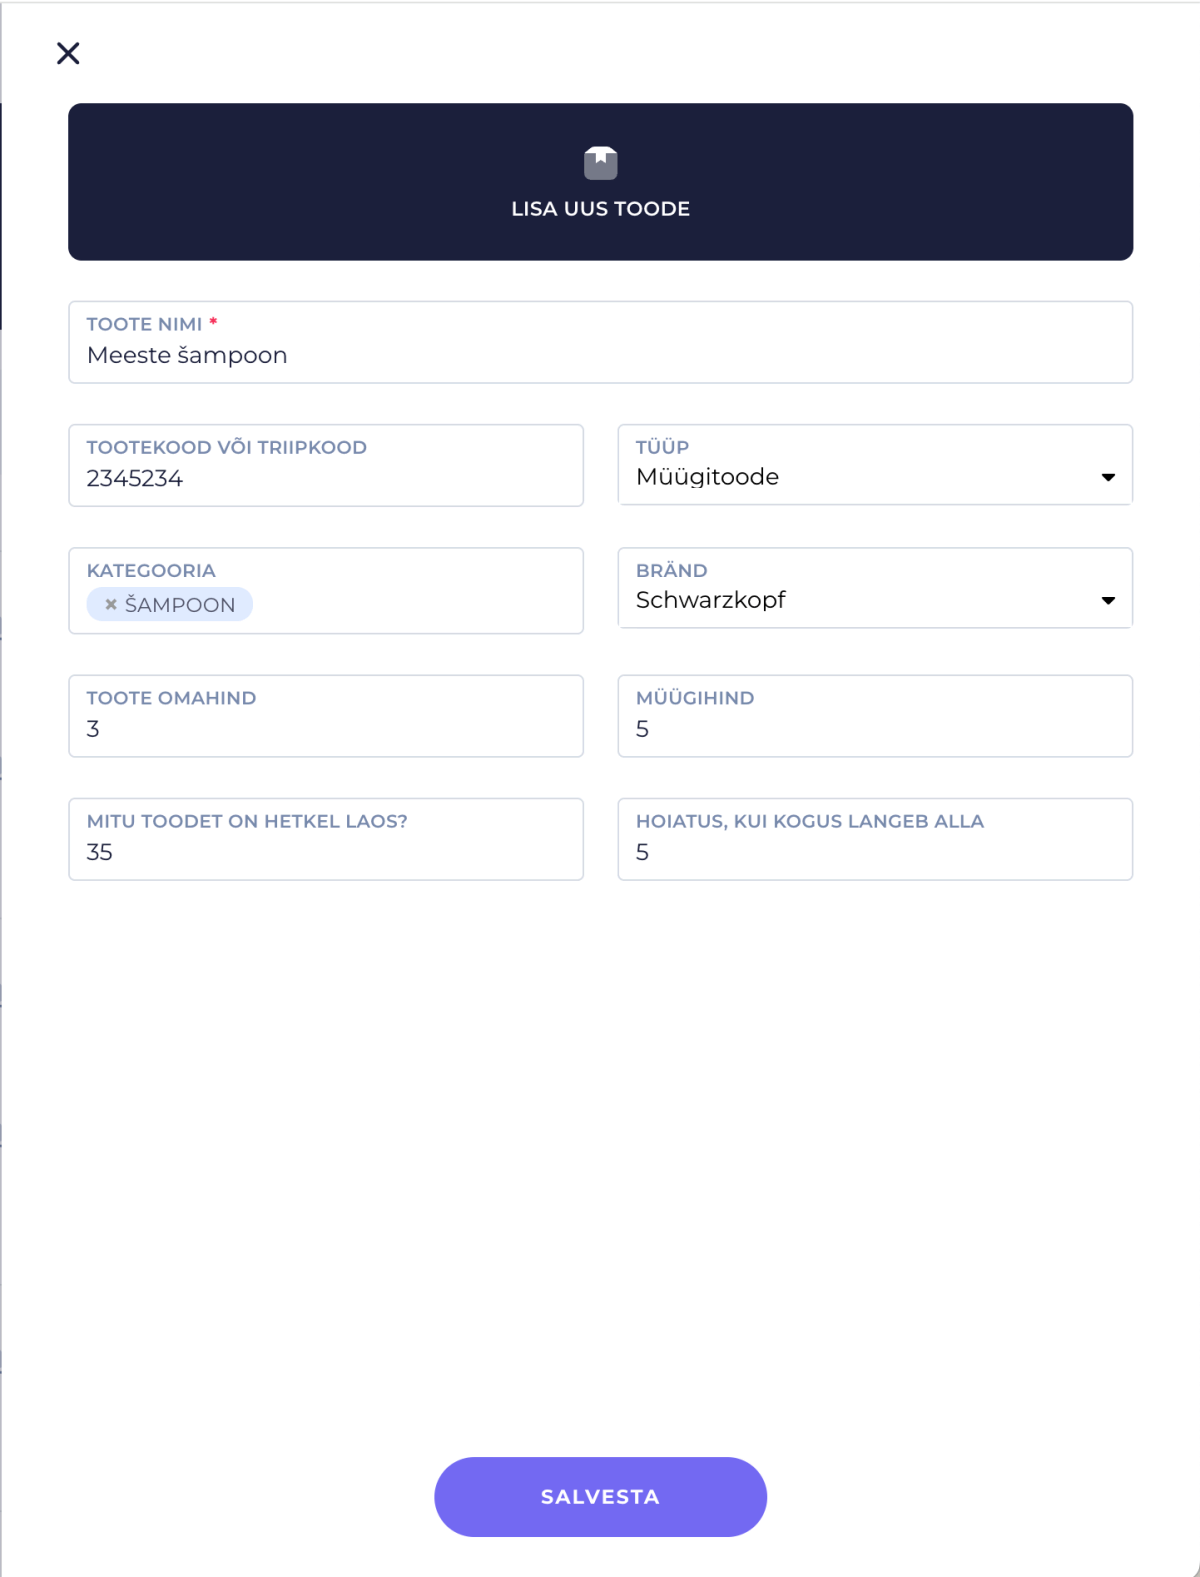
- Open the Products page and select the (+) button.
- Fill in the product’s name field (e.g. “Men’s Shampoo”).
- If needed, add a product code or barcode (if you use a barcode scanner, you can conveniently scan the product’s code).
- Set the category this product belongs to (e.g. “Shampoos”).
- Choose the brand (e.g. “Schwarzkopf”).
- Add the product’s cost price (e.g. “€3” as the purchase price) and its sale price (e.g. “€5”).
- Set the stock quantity (e.g. “35”) and, if needed, a low-stock threshold (e.g. “5”), based on which the system will alert you when stock runs low.
- Click Save and Close.
You’ll now see that the new product appears in your product list and is ready to use.
4. Creating a Similar Product

- Under Products, select the product you want to base a new one on.
- Click the three-dot icon next to the product and select Create Similar Product from the menu that opens.
- Make the necessary adjustments (e.g. change the package size or name).
- Save the new product.
This copying feature saves time and reduces the risk of typos.
5. Additional Product Information
.png)
Once you start actively using or selling a product, every product also has a detail view:
- Product: view and edit the product’s name, brand, category, price, stock, and more.
- Staff: if you’d like, specify which staff members use or sell this product.
- Usage: here you can see the date, which booking the product was used with, and in what quantity (this becomes more detailed once the product has been actively used).
TIP:
If you want to know how to add a product to a booking or sell it at checkout, be sure to check out our separate guide, which you can find here.
Selling products and keeping a clear overview of your inventory helps you take big steps toward growing your salon further. If you have any further questions, feel free to contact the SalonLife team via chatbox or email (info@salon.life).